Sticky element in Axure
In a previous article on the blog, we have seen how to prototype a fixed-positioned menu in Axure. I realized this was [...]

I used to say on my blog that I was a big Omnigraffle fan. And I definitely was. Just as I used to be a big Visio fan. But that was before: since then, I have discovered Axure. For budget or time reasons, most medium-sized agencies (the ones I have worked for at least) prefer not to invest in Axure. It is a complex software, and the licence price makes it a tough decision to invest money and time for the teams for self-training. Visio and Omnigraffle, or even Balsamiq, are definitely simpler to apprehend and start wireframing with. After a few months working with Axure, I figured I would give a few advice, based on my recent discovery of the software, to beginners who were afraid to make the move, just as I was. Please don’t get me wrong: I still like Omnigraffle a lot. But Axure has made my prototyping funnier and a lot more interactive.
All prototyping softwares basically work the same: empty pages on which you can place stencils (pre-existing elements). Axure is just the same, and there is no new process to learn. What changes is the level of possible interactions it allows. Whereas Visio and Omnigraffle only give a few opportunities, Axure allows you to do pretty much anything. Within a few weeks, and with a little self-training, you can use variables and condition interactions. Axure works with layers. If it sometimes creates bugs, it does give a lot of possibilities for interactions such as sliders, accordion tabs or menus. Every element is formatted in order to have a selected and unselected state.
Whereas Visio and Omnigraffle rely a lot on stencils, Axure only has very few basic elements. At first, I was skeptic, as having a rich library of stencils made my work easier and faster with Omnigraffle. But finally I like it better this way. It turns out it is faster to create a square and then modify it to different forms, or program the interactions of a custom menu than re-user an existing one. This way every element is really thought for its application. The danger is to go too far and loose too much time designing elements. That’s one of the keys, in my opinion, for using Axure well: know where to stop, speaking about interactions and design, before loosing too much time in details.
1. Train and exercise on Axure self-training platform
Axure team developed very good tutorials on their website: axure.com/training. You can find challenging and useful data whatever your level is. Depending on the topic, you have access to a demo video, guidelines and tutorials with RP files. This way you can get started very fast with the software, and keep on learning.

2. Stop developing stencils libraries
Though I used to work a lot with stencils, I found out extensive libraries were not so useful on Axure. The basic library is very simple, but offers great possibilites. For example, a simple square easily becomes an ellipse or a down arrow. Drop-down lists already exist, with their options, as well as search fields, etc. It actually takes me less time to create a new menu from scratch than go and look for one in my stencils.


3. Use a grid
Axure allows you to create a custom background grid, or use pre-existing 12-columns or 16-columns ones. I personnally find the 16-columns grid offers more freedom, but both are commonly used. I didn’t go that far in proportions and dimensions before, but it is a good work support, and simple to use as well.


4. Use masters extensively
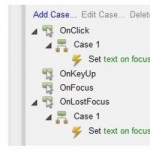
As soon as one element gets repeated, should it be a menu, present on several pages, or even just one element duplicated in the same page (as a list for example), use the Masters tool. It is very simple to use, and avoids repeated changes. I found out it is a great gain of time. No need for an element to be extensively repeated: as soon as it is repeated, even once, it is better to declare it as a Master.
5. Start with no interactions
Just as you start a page with a zoning and then complete it with more details (at least that’s my method), start an Axure wireframe with no interactions. It is tempting, but not relevant, to loose time over a slider when the rest of the page is not very clear. I first place the elements (at least as a zoning), then detail them, and finally program the interactions. Using Masters allows you to simply improve elements with interactions, like menus.
6. Know where to stop
Axure inteactions are so extensive and fun to program that it is tempting to spend hours developing the application. To a certain point, you could: using variables, displaying error messages according to completed forms… But there is one point where the interest of interactions, speaking of UX, stops, and when it becomes pure programming. It can be frustrating, but you sometimes have to choose comments over interactions.
7. Forget about device simulation: it comes built-in
With Omnigraffle, I used to have templates featuring the device for desktop or mobile applications. It made it easier to print the pages and nicer for presentations. Because of the interactions it allows, Axure goes over the device-simulations. It actually comes built-in, within the Export prototype options. You can really make a clickable prototype, so there is no need to display an image of the device.
Ready to start? Learn more about Axure
In a previous article on the blog, we have seen how to prototype a fixed-positioned menu in Axure. I realized this was [...]
Simple text fields are a basic widget in Axure library, and one often needed. Instead of just dropping a text field on [...]
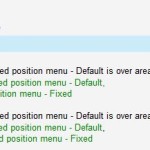
Fixed-position menus are often used on websites or applications today. They allow the menu (or any other toolbar) to [...]